Start with one communication goal
Write the sentence your salesperson should be able to explain using the model. “Show where three replaceable modules sit” leads to a different model from “explain a concealed flow path.” List the two or three features a visitor must recognize. Identify anything that may be simplified, omitted or shown as a separate cutaway.
For an industrial, aerospace or defence display, mark which exterior and internal geometry is cleared for public presentation. A technical drawing supplied for quotation is not automatically approved for exhibition use. Assign one person to approve the displayed configuration before detailed work begins.
Read the layout before the small details
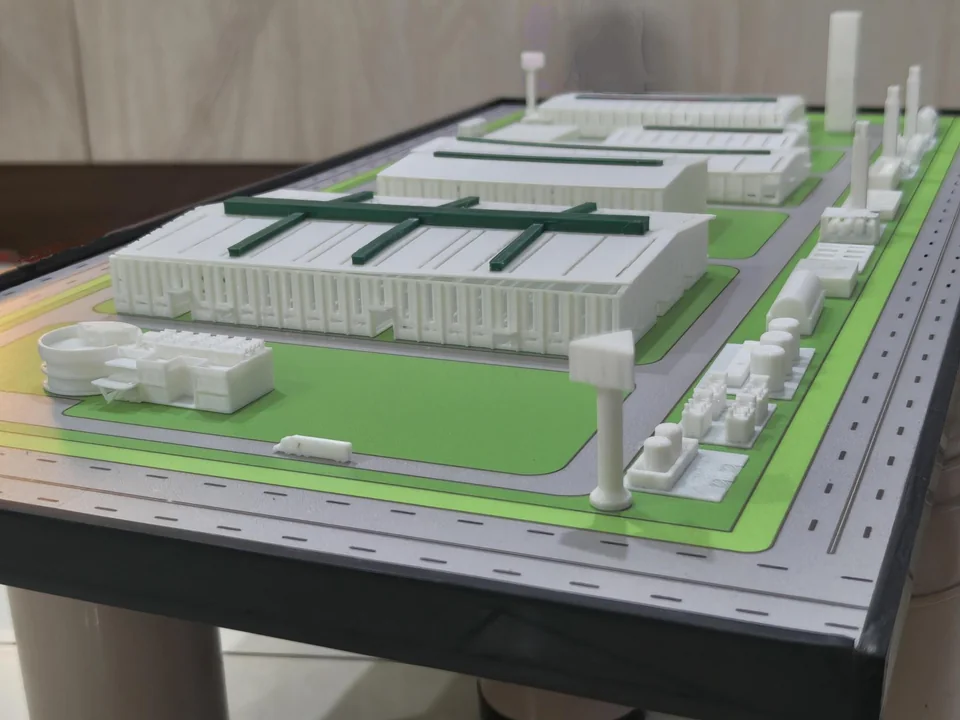
In this photograph, the white buildings stand out against green areas and grey roads. You can follow the site arrangement before looking closely at the smaller tanks and structures. That hierarchy is a useful starting point for a layout model: decide what the visitor should recognise first, then choose which details support that explanation.
For a single-machine model, the priority may be different. A small control panel or connection can be central to the sales conversation even though it occupies little of the overall volume. Mark those features before reducing everything to scale.
Fit the whole display, not only the product
For each axis, divide the full-size dimension by the scale denominator. Then add the space needed for the base, labels, cover, handling and any removable component. Do not choose a scale from length alone: check width, height, viewing distance and the smallest feature that carries your message.
| Decision | Calculation | Implication |
|---|---|---|
| 1:5 product length | 4,000 ÷ 5 = 800 mm | Uses the entire illustrative display envelope |
| 1:8 product length | 4,000 ÷ 8 = 500 mm | Leaves room to plan the surrounding display |
| Example base length | 500 + 80 + 80 = 660 mm | Still needs width, height and stability review |
Decide what survives the change of scale
A dimensionally reduced CAD file is not automatically a useful exhibition model. Begin with three lists: features visitors must recognize, features a presenter must point to, and details that can disappear without changing the explanation. Review those lists against the intended viewing distance. A small feature can be accurate yet unreadable behind a cover; a simplified feature can communicate more clearly if the simplification is agreed and recorded.
Create an annotated image with “retain”, “simplify” and “omit” marks. For internal components, state whether the visitor sees an open side, a removable panel or a separate enlarged detail. If a presenter will remove a part, also identify its storage position and the person responsible for resetting the display.
Prepare CAD and references that can be reviewed
State the file format, units, revision and overall dimensions before transferring files. An assembly screenshot can identify the intended configuration while a marked drawing identifies the dimensions that matter. If complete CAD is unavailable, provide reference views and known dimensions so reconstruction can be scoped explicitly.
Separate “reference only” information from dimensions or features that must be reproduced. Agree a secure transfer route for confidential files; the website enquiry does not accept CAD uploads.
Separate model work from display and transport
| Scope item | Decision to record | Approval point |
|---|---|---|
| Visible geometry | Exterior, cutaway, separate components or simplified details | Annotated view of what will be shown |
| Finish | Colour reference, visible faces, texture and labels | A finish reference or agreed sample |
| Features | Static, removable or a defined movement | Which movement is required and how it is demonstrated |
| Display | Base, mount, lighting, cover and graphics | Overall arrangement and access |
| Transport | Destination, reusable packing, lifting and assembly | Handling plan and responsibility at each end |
A brief you can adapt
Build an approval package that prevents avoidable rework
| Review | Evidence to review | Decision to record |
|---|---|---|
| Geometry | Overall dimensions, public configuration, seams and exaggerated features | The representation is correct for the exhibition message. |
| Appearance | Colour references, label text and agreed finish examples | The visible treatment and spelling are approved. |
| Display and handling | Base, cover, lift points, packed size and assembly sequence | The exhibit can be installed and handled as planned. |
Assign a single person to consolidate engineering and marketing comments. A geometry correction after surface finishing is different from correcting a label before printing. Mark each review with a file revision and date so a later request can be assessed against a stable baseline. Ask how changes to approved work affect the quoted scope and delivery plan.
Practical questions before you send the brief
What if the only references are photographs?
Include front, side and rear views with at least one reliable dimension. Identify hidden areas and details that cannot be inferred. Reconstruction needs its own review; photographs alone do not establish an accurate internal layout.
Should we specify scale or display size first?
If the booth fixes the space, give the maximum model, base and cover envelope first. If comparison with another model matters, state the required common scale. Resolve any conflict before treating either number as fixed.
What should the handover record include?
List the delivered pieces, removable elements, labels, assembly instructions and agreed packing. Photograph the arrangement before packing so the installation team has a reference.